
Thursday, 27 June 2013


Wednesday, 24 April 2013
fast loading css social widget for blogger

hi every one you know social networking is a great way to gain traffic for your blog and and it increase you SEO and you get 1000 of backlinks for your blog. Today i,m going to tell you that how to add beautiful and fast loading css social widget . it is user friendly and it is compatible with major browsers i,m writing about its compatibility in next paragraph
Browsers compatibility:
browsers compatibility is a main issues of new widgets but this widget work with these browsers
- Google chrome 14 and 14+
- firefox 4 and +
- safari 4 and +
- opera 10 and +
- I.E 8 and +

Optimize blogger comments archives and labels for better seo

Now i,m going to tell you that how to optimize archives, labels and comments.
How To Optimize Comments :
Comments are very Good and best way to increase your blog ranking if you have good comments then it help you to increase your blogs rank but if those comments are not good and irrelevant then it totally destroy you ranking in search engines . So, the best way to optimized your comments for search engines The you must keep your comments external links No-follow . Follow me to make your comments links no-follow.
- Goto blogger
- Edit html and find
PaperCut, really cool social icons.
Again from the hand of Ulises Arvizu of “Maquiladora de Sueños” (with new blog design), bring you another freebie for readers , there are four illustrations / icons to blog subscription services like Feedburner (RSS), Twitter, Facebook, and Email.
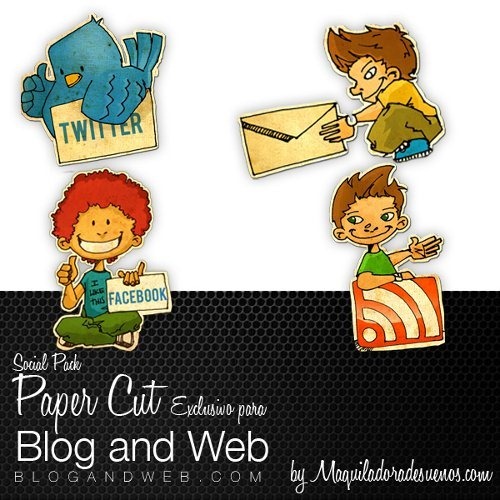
These are PNG24 format with transparency in two sizes, 100 and 250 pixels.
License
- Released under Creative Commons Attribution 2.5 License.
- Personal or commercial use is allowed but not selling.
- When distributing, please link to this article and not to the file or to another post or server.
Download
Monday, 1 April 2013
Tips For A Better SEO-Friendly Image

When it comes to SEO, webmasters and bloggers have a tendency to undermine the importance of image optimization, perhaps even way too much that they completely forget about it – intentionally.
Some would even say that optimizing images isn’t that much worth all the trouble because it doesn’t really give that much in return. But then if you really value SEO, wouldn’t you do everything you can to help your site generate more traffic?
Now if you said ‘yes’ to the above question then you should have no problem following thesesimple but very helpful tips on how to make your content images SEO friendly.
Alt tags – This is basically the very first thing that should pop in to your mind when it comes to optimizing images for SEO. Search engines (or search engine spiders) are virtually blind; all the efforts you put into making all those gorgeous images on your site are all for naught if they don’t have any alt tags. Search engines pretty much ignore images without alt tags.
Image filename/title – Name your images with relevant keywords and separate them with dashes rather than underscores. First letter capitalization won’t matter.
Image filessize – We’re talking about both in terms of the dimension and the byte size (kb/Mb). An image that can slow down your site’s loading speed can have a negative impact on your SEO, so make sure you make all the necessary adjustments to your images in both aspects. There’s no specific size that you need to follow but as a general rule, you will want to keep it to a minimum, so as not to decrease your page’s load time.
NOTE: On alt tags and filenames, don’t overdo it! Don’t cram in too many keywords in them. For filename/title, probably best limit it to five words only.
Also, if you got lots of images that need alt tags, don’t fret. There are plugins that you can use to automatically do all the work of putting alt tags on your images for you.
Replace Newer, Older And Home Links With Images

Currently or by default, your blog readers navigate between each of your blog posts by clicking on the hyperlinked texts below it that say something like “Previous” and “Next” or “Older” and “Newer” accompanied with a “Home” in the middle. Here’s a very simple and easy customizing tip that’ll show you how to use a set of images instead.
- Log in to your Blogger dashboard and head over to the Template page.
- Click on Edit HTML and then be sure to put a check on the Expand Widget Templates box by clicking on it.
- Using Ctrl+F, search for the following codes and replace them with the corresponding<img> tag:
Search for <data:newerPageTitle/> and replace it with:
<img src='http://bandofgirls.googlepages.com/Newer_post_icon.png'/>
Search for <data:olderPageTitle/> and replace it with:
<img src='http://bandofgirls.googlepages.com/home_icon.png'/>
NOTE: If you happen to be using a custom built template then there’s a chance that you might not be able to find the above codes. In other words, this tutorial might not be applicable.
You can use other images instead of the one in this tutorial. All you have to do is replace the above image URLs with those of the images you want to use.
Have a great day, everyone!
Disabling Blogger Lightbox

The lightbox is one of a website’s best tools for displaying your photos, images, and graphics, and Blogger has its own lightbox plugin for posting photos.
While this plugin is very useful for image-heavy blogs, some site owners don’t like the idea of using it on their site, or they may already have installed a custom plugin which might conflict with the default lightbox. So here’s a quick blogging.org/2011/11/how-to-disable-official-blogger.html” target=”_blank”>technique I’ve learned from Harish of Way2Blogging on how you can disable the Blogger Lightbox.
- Login to Blogger > Dashboard > Click on More Options dropdown menu > Settings.
- Select Post and Comments > Showcase images with Lightbox? > set it to NO.
- Save settings.
How to Provide Background for Each Blogger Post

A good background gives your site personality and uniqueness aside from making it look good, which can help attract more visitors. So how can you add a background to your Blogger post? Well, here’s a good find courtesy of Rohit Malik of HackedBits who shows you how to do this.
Below are the steps to follow:
- Look for the right image for your post. You may search from Google for copyright-free images or use your own.
- Upload your photo to a free web host site such as Photobucket.com. Copy its link.
- Now put the code in the post template.
- Login to your Blogger and on the Dashboard, click Settings.
- On Settings tab, click on Formatting.
- Scroll down in the Formatting tab to the Post Template.
- Copy and paste the code below at the top of the box:
<div style="background:url(LINK_OF_PICTURE) no-repeat;">
Paste </div> at the bottom of the box
- Save Settings.
- Click on Posting found at the top. The Post Editor will open up, with the code inside it.
- Change ‘LINK_OF_PICTURE‘ with your link to your chosen background image, which is the one you have uploaded on a free hosted site. Delete “no-repeat” in the code line if you wish to not repeat the image.
- Key in your post before </div> at the bottom, name a Title then hit Publish.
Liked It ? Please Share
Sunday, 16 December 2012
ADD ADVANCED META TAGS TO BLOGGER FOR BEST SEO
On my Previous post How to Add Meta tags for Blogger I described the Importance and how to use those tags for Better SEO. Today I will Give you the Advanced Meta Tags Through which your Blog will be at a Good Position on Search Engines. So keep up reading the whole article thoroughly.
How to add Advanced Meta Tags to Your Blogger?
Keywords- Best Keywords that Suits Your Blog (Separated By Comma)
How to add Advanced Meta Tags to Your Blogger?
- First, Login to your Blogger and select your Blog.
- Go to Template –> Edit HTML –> Proceed
- Now Search for-
- Now Paste the Following Codes just after the above code-
- Now Change Description and Keywords as your needs.
Keywords- Best Keywords that Suits Your Blog (Separated By Comma)
Saturday, 15 December 2012
20 Twitter Badges to Show Off Your Tweets
There are a number of ways to promote your Twitter account. You can add yourself to one of the many growing Twitter directories, advertise your brand, or, as I'll discuss in this post, feature a badge with your Twitter information on your website, blog, or even in your email.
Here are 20 embeddable badges and widgets that you can customize to include your tweets and, in some cases, those of your friends. Have another badge or widget to add to the list? Tell us about it in the comments.
Twitter badges

Chris' Twitter Badge - A simple HTML badge that comes in the form of raw code you just copy-and-paste while changing a few links. It will show your last four tweets and keeps the basic Twitter branding and logo from the site.
SayTweet - SayTweet allows you to upload a picture of your own, tag the Twitter users shown, and their tweets will show up in speech bubbles on the image as they publish them.
Sigpad - Sigpad asks you to enter your Twitter username and it then creates a bookmarklet you can add to your browser toolbars. Once you've done this you can compose emails in AOL, Gmail, Outlook, Windows Live or Yahoo Mail, drag the bookmarklet into the body, and your latest Twitter update will be shown in the email when you send it.

TwitStamp - TwitStamp lets you set up an easy, attractive, and customizable badge that displays your latest tweet. You can select the badge's size, background and so on. You can also set up a TwitCard that will show your name, avatar, bio, latest tweet, number of followers and more.
Twitter Statuses Badge - A Twitter badge that will show the last few tweets from your account, along with how long ago you posted them and the permalink to them so that people can go to them directly. Can be customized via CSS to better match your blog or site.
Twitterati Badge - A very simple JavaScript solution for your badge needs that will let you set height, width, colors, border and so on. Displays your tweets as well as those of your followers.
TwitterCard - One of the biggest complaints people have about badges for any service is that they don't fit in with their overall blog design. TwitterCard tackles this complaint head-on by giving you a JavaScript powered badge to show all your Twitter info in the 125X125 format. This will fit in perfectly with your ad units, or just about anywhere on your site without looking the least bit out of place with current design standards. Also has the ability to be implemented via HTML or a WordPress plugin. (please note that the JavaScript was not working when we tested it, but the other methods were).

TwitterMySite - Enter your user name, any extra text you may want and in what color, and simply click "Generate my Button." You'll be offered up a selection of different badges, all set with the variables you entered, ready for you to paste into your site.
U Stand Out Twitter Badges - U Stand Out offers up a nice selection of badges you can use for your site or blog that range from artsy to straight-to-the-point.
Vincent Abry Twitter Badges - A collection of Twitter badges for just about every taste in various sizes for all the different blog configurations out there.
WishAFriend.com Twitter Widgets - These Twitter widgets are all flash-based and offer you different themes such as holidays, fun, USA and so on and will display a scrollable selection of your most recent Tweets. Just enter your username and then get the embed code to get started.
Twitter widgets

Bastawhiz's Twitter Widget - A customizable widget that lets you set the height, width and the number of tweets to display. Each tweet is hyperlinked to the permalink on the Twitter site for easy access.
Blogger Buster Twitter Widget - A Twitter widget built specifically for blogs on Blogger.com. Just enter a title for it, your username and the number of tweets to display and you're done.
Language Is A Virus - Language Is A Virus offers hundreds of different Twitter widgets that you first choose by the size small, medium or large, and once you've selected that, you can sort them by color. Find the one you want and you have it as a badge or a widget, but if you go the widget route it will also display your last 5 tweets.

Official Twitter Widgets - Twitter offers a mixture of Flash and HTML widgets depending on the platform you wish to put them on. Officially supported sites are Blogger, Facebook (via an application), MySpace, and TypePad. Twitter also offers generic widgets for other sites.
Sprout - Ever wanted to build your own widget from the ground up? Well, Sprout will let you build them for several services, but Twitter is probably the most popular. If you're worried about not knowing anything about programming, Sprout handles that for you by giving you the ability to just drag-and-drop the elements you want, but arranging them easily in the way you want.
TwiBadge - TwiBadge is a WordPress plugin widget that allows you to easily add the official Twitter widget to your site. This allows you to show a group of your most recent tweets, your user name and number of followers, but best of all, it will also enable your readers to login and follow you so they can do everything right from your sidebar.

Twitter Widget - WidgetNest offers up a nice little Twitter widget that keeps the theme of the main site. It displays your name and avatar, and your last several tweets scroll one at a time at a speed of your choice. Coding is available as JavaScript and Flash.
TwitterSalt - TwitterSalt allows you to customize your widget on their site and then just by using a single line of HTML code you can post your updates on sites, on message boards, in emails and more.
WordPress.com Twitter Widget - WordPress.com hosted blogs can't upload their own plugins, but they've been nice enough to add a built-in widget for you to add your tweets to your blog. Just enter a title, your Twitter name and the number of tweets to display, and then you can just add it to your sidebar
Friday, 14 December 2012
Add Meta Tags to Blogger for Better SEO
In this tutorial we will discuss, how to add meta tags to blogger blogspot blog, to improve Search Engine Optimization (SEO) of blog, and go beyond the limitations of the blogger platform.
You must have been to many articles that are telling, how to add meta tags to blogger
What are Meta Tags?
A meta tag is a line of HTML code that describes your site. It used to be the case that you placed meta tags at the top of every web page; one meta tag for keyword, another for a description. Although they would not be seen by viewers of your web page, search engines (such as Google) used them.
Keywords are those that best describe you business or blog's purpose. The description contains your keywords, but is sentence style. If someone used Google to search for one of your keywords (for example "blogging hub") and you were listed on the search results page, the meta description would appear under your listing providing the user with a brief summary of your blog.
However, because so many people abused meta keywords, many search engines don't use the meta tags in their algorithms anymore. But it doesn't hurt to include them on your blog.
Limitations of Blogger and SEO
Well, by default Blogger is not properly optimized for SEO. Meta descriptions and keywords are not supported. Title tags are also not optimized.
However meta tags and meta description can be inserted into Blogger template to make it Optimized. But make sure that you have done correction of your title tags, but if you don't know anything about title tags then please refer to adjust blogger title tags to improve SEO first.
How to Add Meta Tags to your Blog Home Page
1. Login to Blogger if not already logged in.
2. From the Dashboard, go to Design, Edit HTML.
3. Back up your template as a precaution by downloading full template to your computer.
4. Check the Expand Widget Templates box.
5. Find these lines which will be near the top of your template:
<head>
<b:include data='blog' name='all-head-content'/>
<title><data:blog.pageTitle/></title>
<title><data:blog.pageTitle/></title>
<b:if cond='data:blog.url == data:blog.homepageUrl'>
<meta content='Place your blog description here' name='description'/>
<meta content='Place your blog keywords here(separated by commas)'
name='keywords'/>
</b:if>
7. The blog description should be more then 120 characters and less then 150 characters including spaces.
8. It's important to use keywords, it is just as important not to overuse them. If you do, your site will be flagged as "spam" and won't show up at all on results pages. My recommendation is to keep your keyword usage to 4-8 percent. So out of 100 words, you should only use a keyword 4 to 8 times.
9. Click on Save Template button and you are done.
Adjust Blogger Title Tags to Improve SEO

Add Meta Tags to Blogger for Better SEO
The default title tags of blogger are like that “first blog name and then post title or title of the post”, which is not search engine friendly and popular search engines like Google, Yahoo and Bing don’t give them much importance. Instead of this the search engine gives more importance to the title tags, where the blog name comes after the post title. Following example will show you the main difference of default and SEO optimized title tags. First the default title tags which looks like Blog Name | Post Name.
As you have seen the default title tags there is just a simple trick with which it becomes search engine optimized and you could get the targeted traffic.
Before Applying Hack


Following steps will help you to improve search engine rankings:
Editing Title tags for better SEO
1. Login to Blogger. From the dashboard go to Design > Edit HTML
2. Now find the code given below by simply pressing Ctrl + F key in the HTML tab
3. Now replace it with the following code (Ctrl + C copy, Ctrl + V paste)
4. And that's all you're done now click on Save Template and then View Blog.
As you have seen that your page title comes before you blog title. Now you will see a significant improvement in traffic accessing your site.
Add Outbrain Ratings Widget to Blogger
Outbrain provides a free and very stylish content recommendations and ratings widget which can be easily added to your Blogger Blogspot blog. In this tutorial I will discuss the benefits of Outbrain and also provide a step by step walkthrough of the process of adding an Outbrain widget to your Blogger blog and your Feedburner FeedFlare if you have burned your blog feed at Feedburner.

Benefits of Adding Outbrain to Your Blogger Blog
By adding an Outbrain content and ratings widget to your Blogger blog you will encourage visitors to record their reactions to a post they have just read. Along with features likes polls this is another good method of encouraging visitors to interact with your blog. Outbrain also makes it possible to display your most popular posts within the widget. In addition the Outbrain ratings widget may help drive more traffic to your blog when your visitors use the Recommended Posts feature which is embedded in the widget. By the same token it may also mean that the traffic doesn't stay long as visitors will be wooed away by recommended links so you will have to weigh up the benefits versus the costs for yourself. Outbrain also provides reports on widget activity
How to Add an Outbrain Ratings Widget to Blogger
1. Register at Outbrain. This is a simple sign up process that requires you to click on a confirmation email once you have requested sign up and filled out a simple form.
2. Once registered click on Get the Widget from the footer menu
3. Choose Blogger as your Blogging platform
4. Select the language of your widget if other than English which is the default
5. Click on Get the Widget button and Outbrain will automatically refer you to Blogger in a new window. Sign in to Blogger in the new browser window. Don't close the Outbrain window as we will be returning here.

6. Choose your blog from the drop down menu and click on the Add Widget button.

7. Navigate to Layout > Page Elements and reposition if necessary your new widget which will now be appearing in the sidebar of your blog. Save any changes you make.
8. Return to Outbrain in your open browser window and click on theclick here link to verify your blog. You will receive a message verifying that you have claimed your blog
9. Click on the View Blog link in the menu tab section and view your new Outbrain widget in action.

Note that once your readers start to rate your posts by clicking on them the stars will become yellow. 5 yellow stars is an excellent rating
Customizing Your Outbrain Ratings Widget
1. Return to the Outbrain window in your browser
2. Navigate to Manage Posts using the Sidebar Menu on the lefthand side
3. In the list of blogs you will see your blog listed. Click on thesettings link

4. If you leave the default setting you will see recommended links appearing as pictured above in #9. If you don't want any recommendations you can set this to no.
5. If you have set up your blog with the idea of earning a little extra money you may choose to turn off sponsored recommendations. If you leave the radio button set to yes any proceeds from the sponsored links clicked on will go to charity. The charity sponsored can be selected via the drop down menu
6. Outbrain will show the most popular posts in the sidebar of your blog if this feature is enabled. To enable popular posts select theenable radio button.
7. Click on the Submit button
Adding Outbrain to Your Feedburner FeedFlare
If you already have a FeedFlare appearing at the footer of your burned Feedburner feed of your blog you can easily add Outbrain too.
Go to Feedburner and choose your blog from the list of My Feeds. Select the Optimize tab and then FeedFlare from the lefthand sidebar menu. In the Personal FeedFlare section paste the following code (URL) into the text box:
http://widgets.outbrain.com/FeedFlareUnit.xml
and click on the Add New Flare button. Click on Save. Your readers will now be able to rate your blog straight from your Blogger feed.
Outbrain Troubleshooting Tips for Blogger Installation
- When you install Outbrain on your blog resist the temptation to rate one of your posts as this vote can't be deleted once it is cast. Even when I tried uninstalling and reinstalling the widget the vote did not clear.
- The Popular Posts feature takes a while to show any posts as it needs at least 2 visits before it will start rating the post
- If you have other problems with Outbrain try this active Outbrain support forum for answers
In this tutorial you have learned how to install the Outbrain Ratings widget on your Blogger Blogspot blog and customize it. Also some of the benefits of the Outbrain widget were discussed along with a couple of Outbrain installation troubleshooting tips. If you have a moment let me know how you get on installing this widget. Don't forget to bookmark this post for easy reference.
Subscribe to:
Posts (Atom)